I just finished working on an environment job on a yet to be released IP and thought that this was an opportunity to work in UE5 and also work on any new workflows before something else comes along. As the developer of Extile suite of non-repetitive tiling materials - that can be found on the Unreal marketplace (https://www.unrealengine.com/marketplace/en-US/product/extile-plus-non-repetitive-tiling-material) - I usually use these environments to test new functions/ materials or ideas that I can add to newer versions of the product line or share any new workflows on my youtube channel. (https://www.youtube.com/c/AlexandrosDemetriades67/videos)
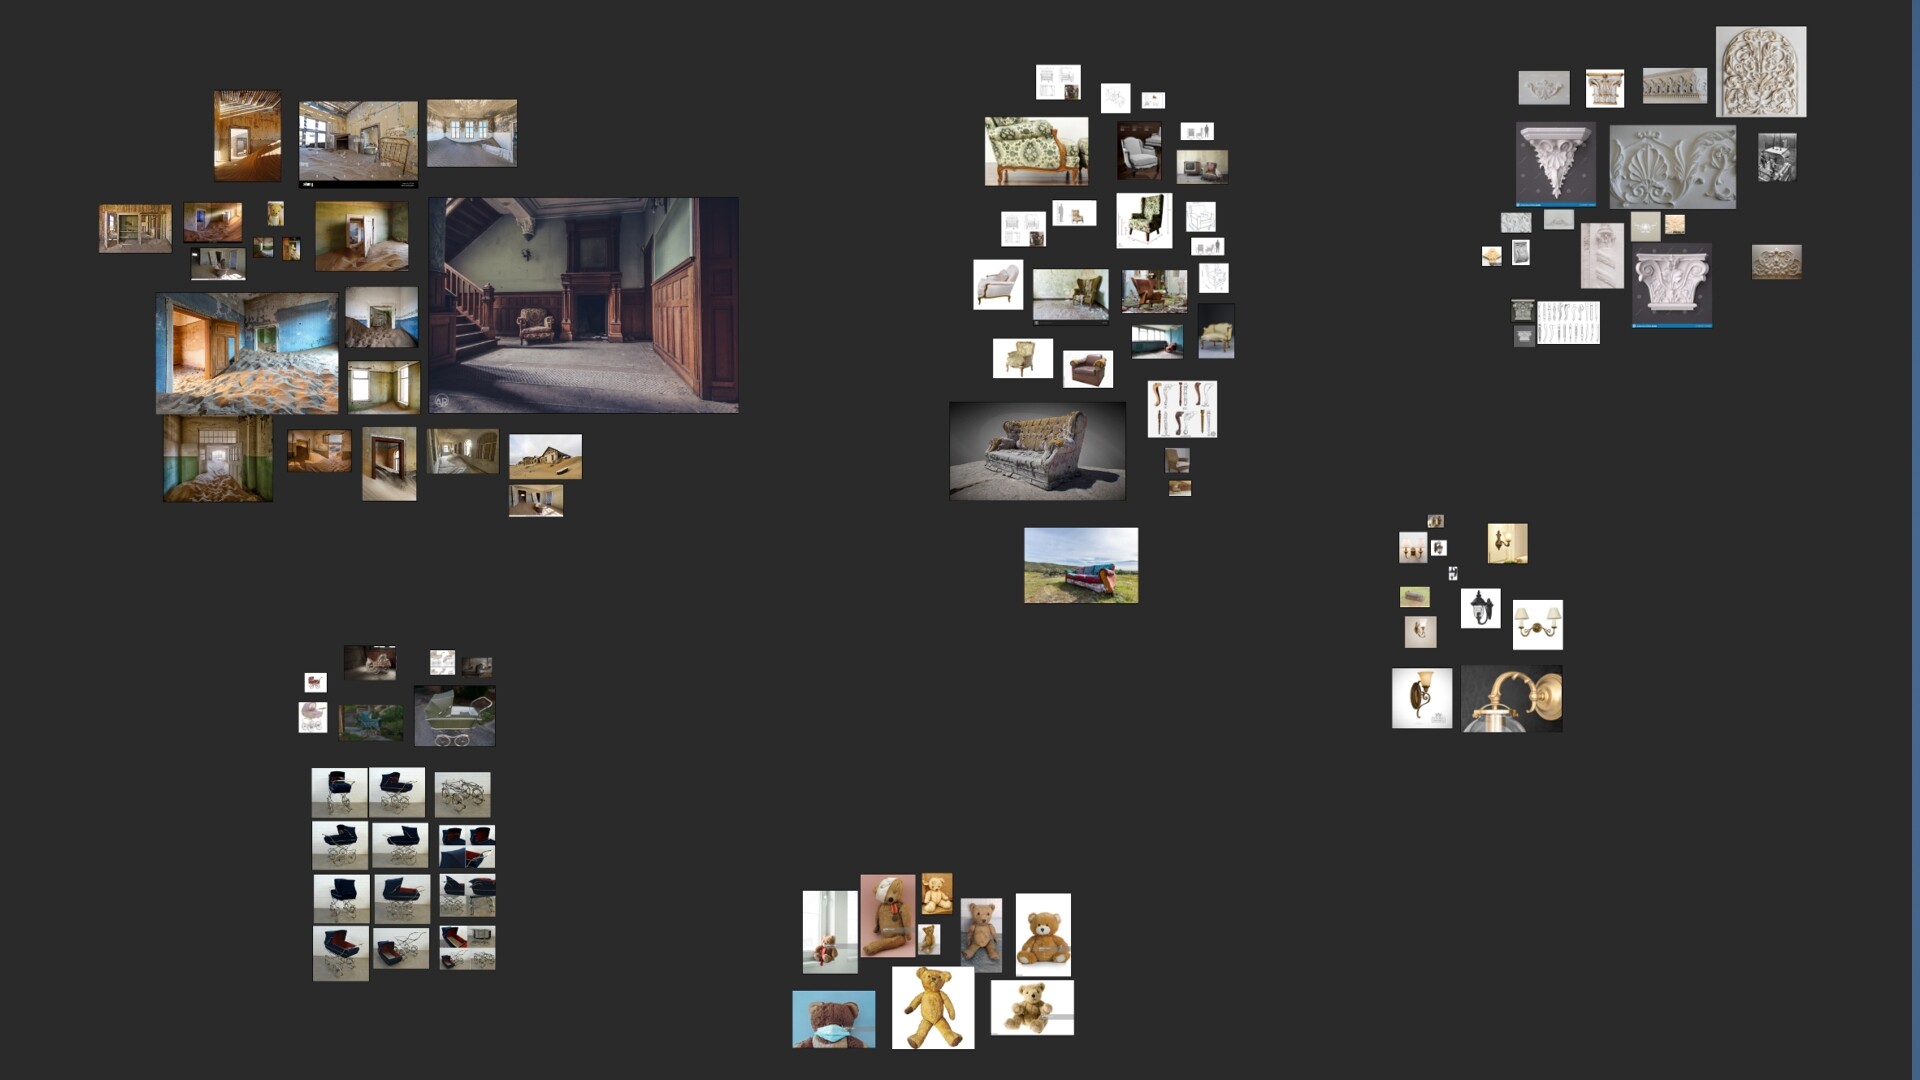
So I started as I usually do with collecting some reference shots. Honestly, I find it difficult to settle on one particular one idea cause I get this urge to somehow want to create them all! In any case after dragging them into pureref and staring at the time for some time something will catch my eye - in this case its the main picture in my selection. I will start by modeling something that I feel could be challenging and then seeing if it's worth continuing - in this case I want to create the upper wall decor in blender - that was my initial goal as I haven't done something similar in Blender. I have been a 3ds max user for quite some time but I have recently made the switch to Blender and have been using it daily for the past 6 months. I have to say I'm hooked! Love working in shortcuts, the addon community is great (Extile by the way is also available for Blender now as well - https://blendermarket.com/products/extile) and the overall experience is much better - imho - than 3ds.
As I begin to model parts I also try and think more deeply on the scene and in this case I wanted to add an additional challenge to the process and thought that sand would be a great challenge to add so I begun to think on how this mansion/room would look if it was somewhere abandoned in a desert and covered with sand.
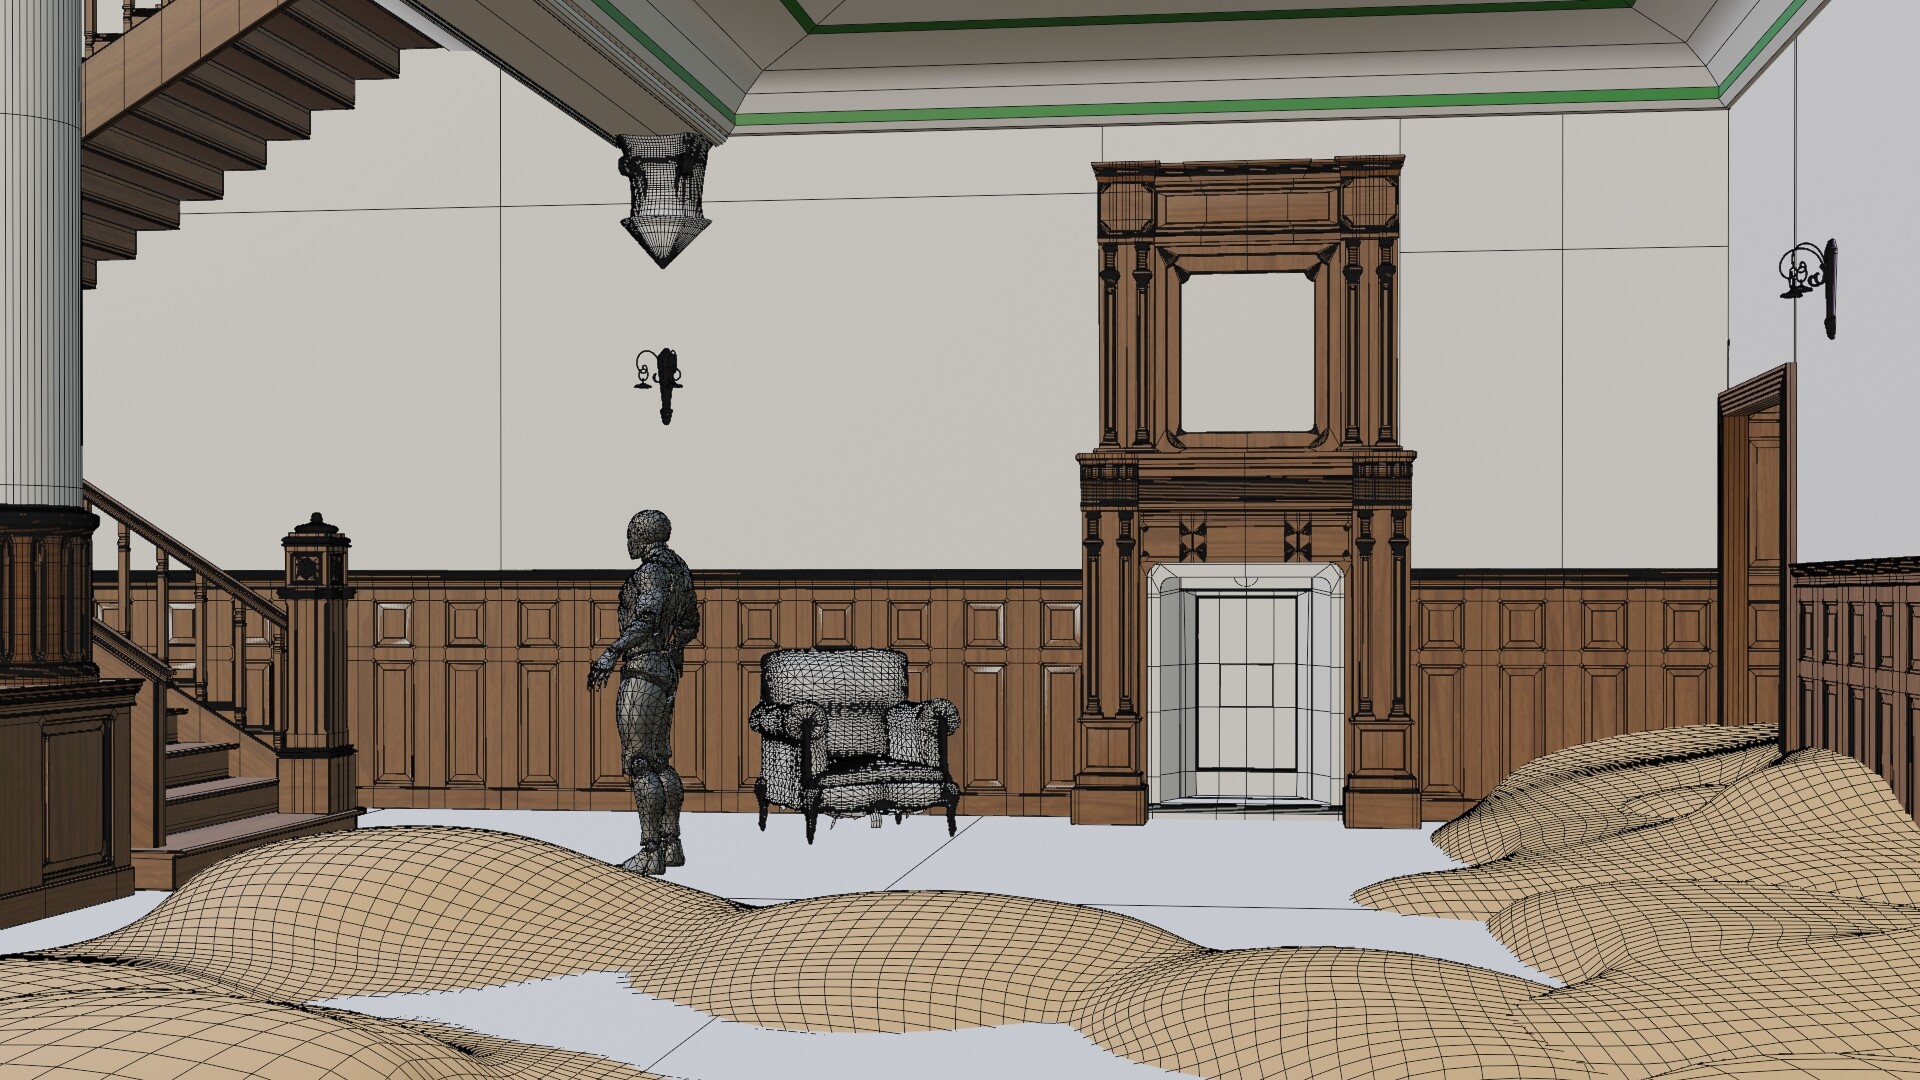
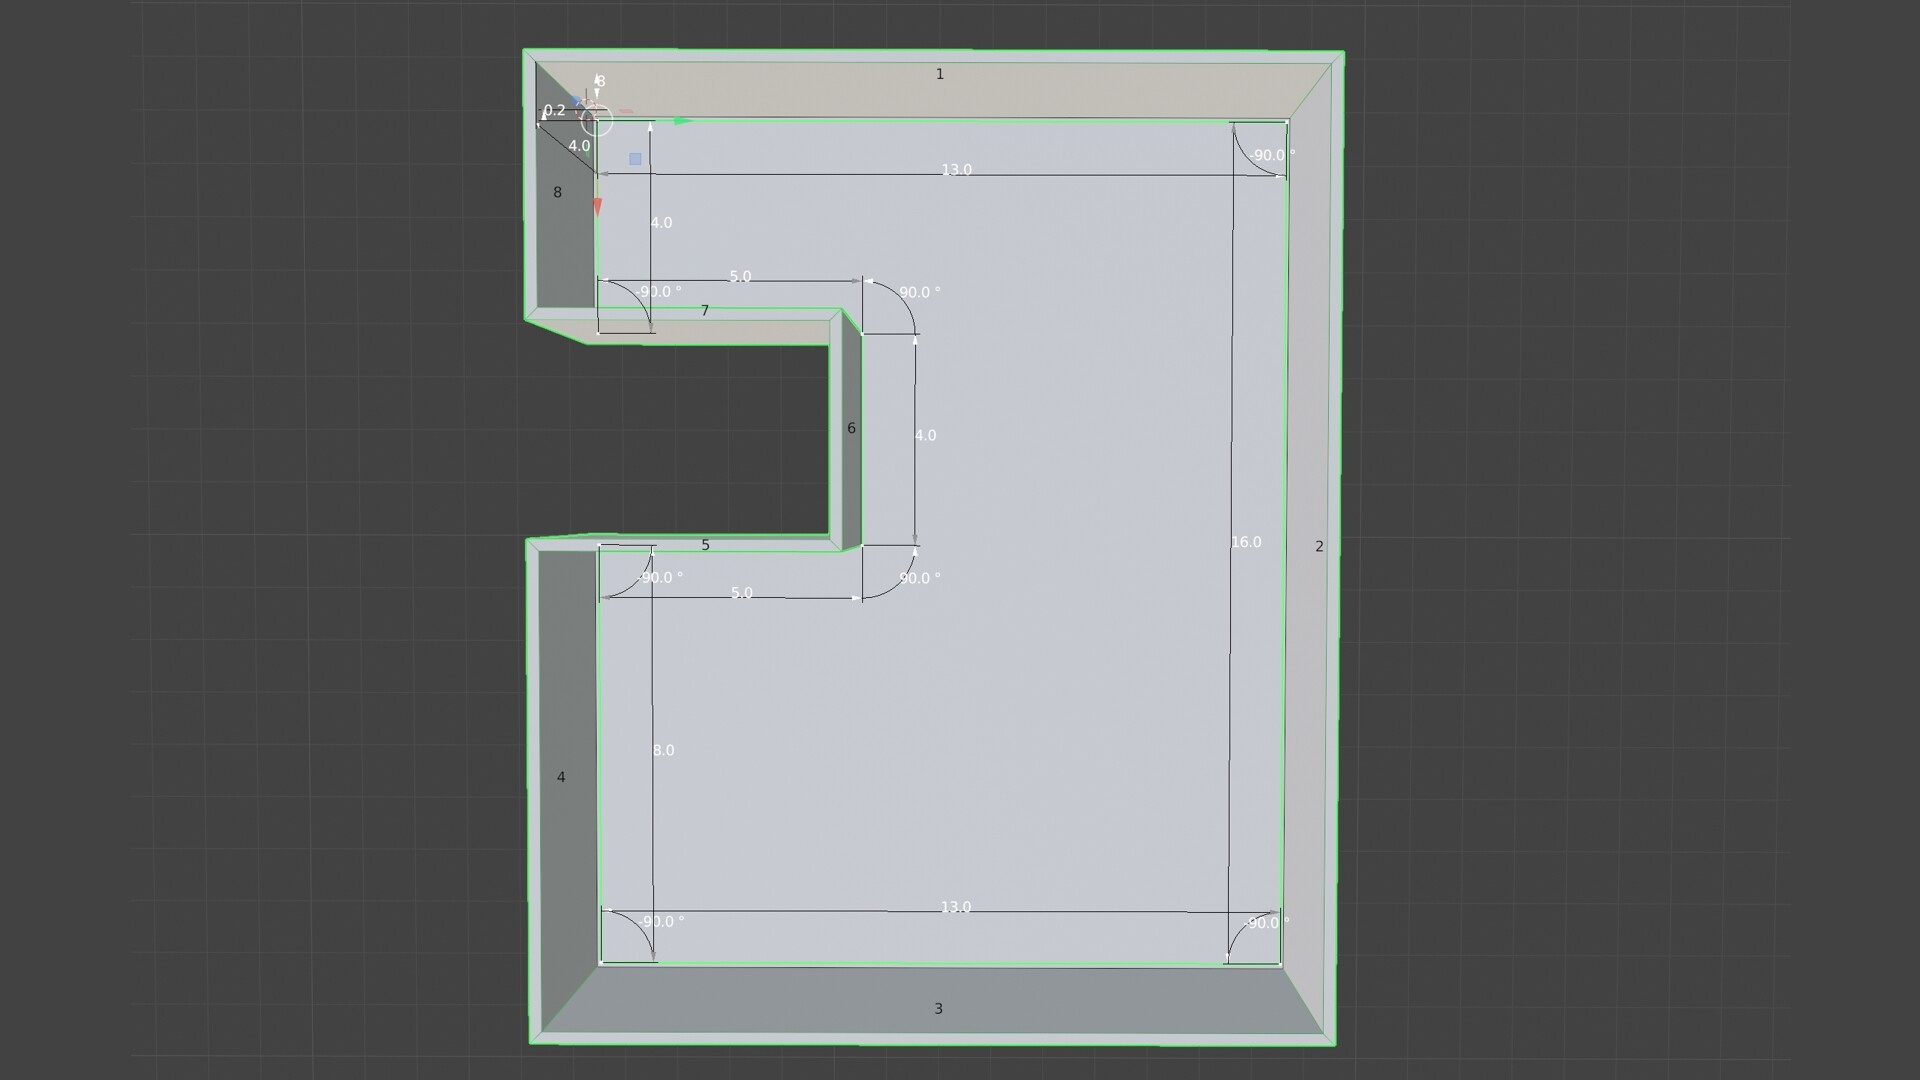
So after I create a few props and I'm happy with how things go I start constructing the modular pieces, in this case some very basic shapes. One thing that I found very useful is Blender's archipack addon which comes free with Blender and lets you quickly place walls and windows etc. Here I also do a my initial blocking as I find it easier to correct any issues in the modeling software rather than using Ue4 and going back and forth. Once I have an airtight environment I move on. I also have a habit of saving a new version of anything I'm working on when I begin the day - this way I always have a back up of the previous day. I also use the ue4 mannequin as size refence that I exported from ue4.
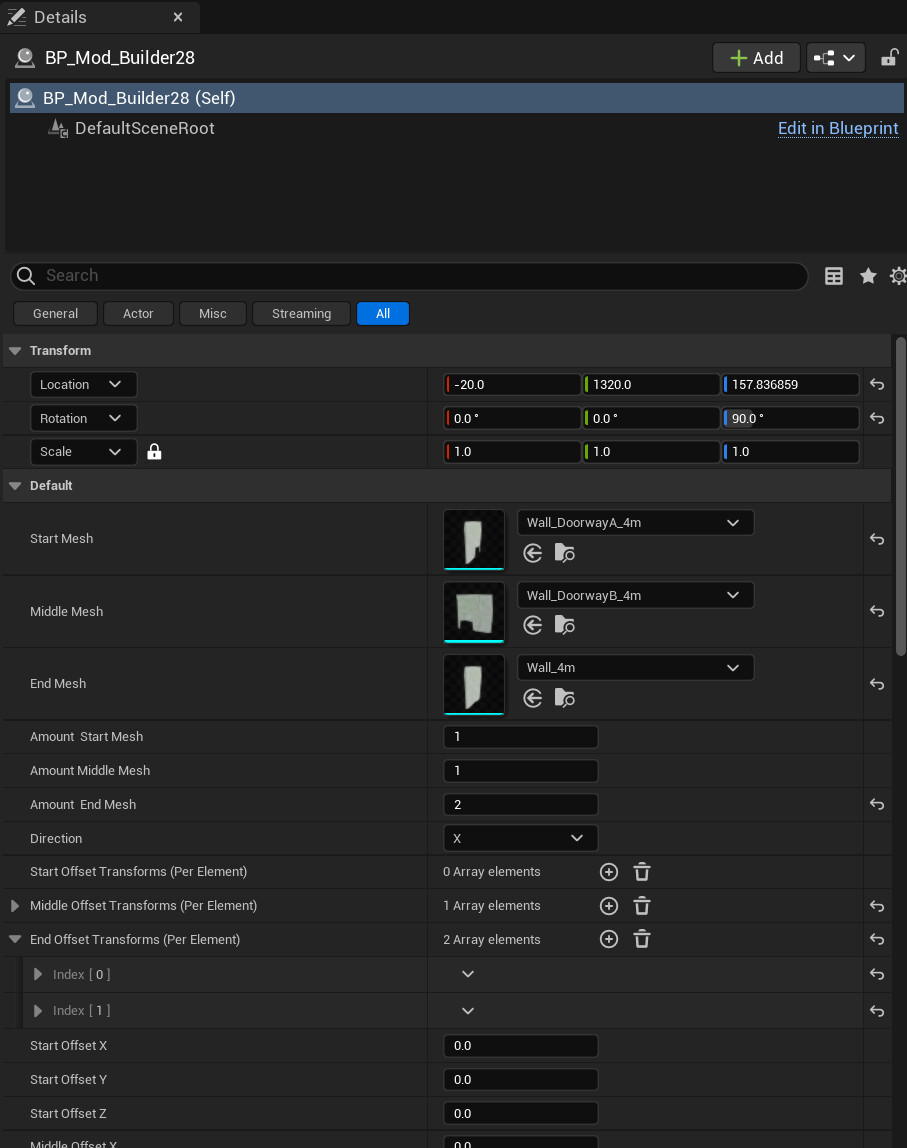
In Unreal I do the same by using a BP script I wrote that lets me quickly fit pieces together (This is part of Exsite that is also for sale on the Unreal marketplace as well). Once happy I can merge the meshes into one and start working from there.
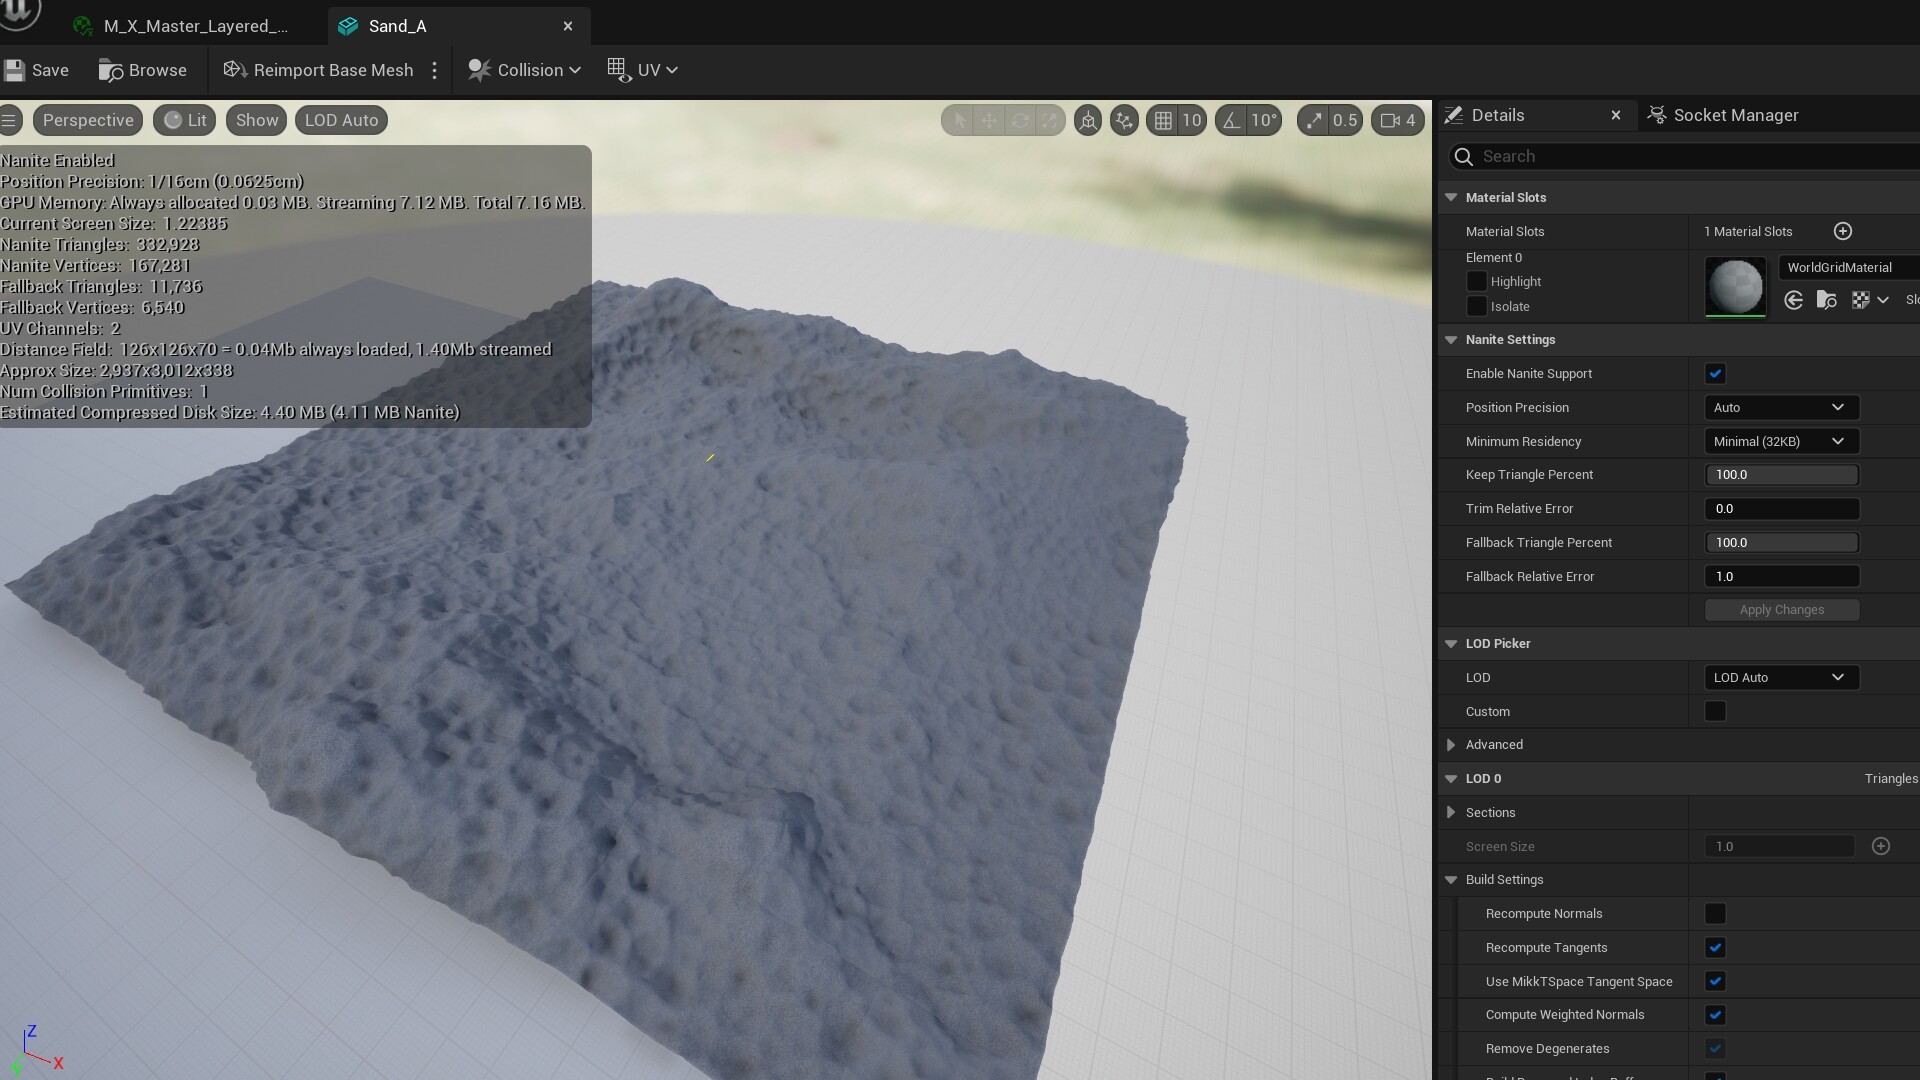
I also modeled the sand inside the building in blender and this time I took advantage of nanite to use it as is. I could have used even more resolution but I was happy with this amount. I also modeled a quick landscape for the surroundings using world creator but unfortunately it doesn't show much as I concentrated on the inside more. Initially I thought I could use the landscape as the inside as well but the detail wasn't there so here is where nanite shines - allowing for detailed meshes that otherwise would not have been possible. However it does come with its limits and in this case nanite doesn't work with material layers (or with vertex painting for that matter) so I had to copy the functions and create a new master for the sand based on the existing ones I had.
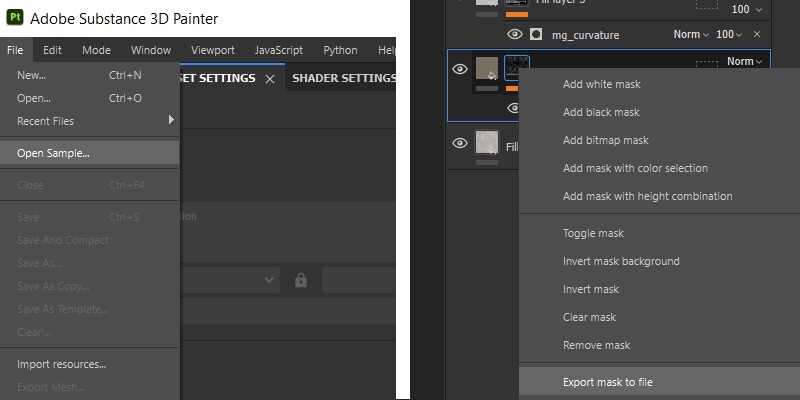
Once all the modelling and UV was done I switch to texturing and start the baking process to get the masks I want. For Uving I usually resort to auto unwrapping and test and see if there are any issues - if so then I go and either manually fix them by stitching Uvs or creating new seams. What I most definitely try and do is maintain texel density at about 1k/m. I usually work in 2k textures and it was no exception for this project as I like to keep things light and optimized as much as possible. In ue5 and nanite you can get away with using low polys but baking is still very important to get good texturing - unless its photogrammetry. I've written about my method before and it's not something new but the way I like to work is use substance painter as more of a look dev tool - once I'm happy say with the look I will use the tile sample in substance painter to get the main tiling texture out and then export up to 4 masks that detail various curvature and dirt paths. Alternatively I can use any tiling texture that I like. I do this for large environments usually so I can also get more detail from my textures if I wanted to and also it is a very optimized workflow. This coupled with any of Extile's non-repetitive tiling masters or functions covers all my needs and I never have to worry about repetitions in my textures.
Once done I import those textures in another package - in my case substance designer - and pack them into 1 texture - RGBA. I used this technique for a lot of the basic environment parts. This type of material is now included in the newest version of Extile Plus (V2.9) as part of the material layered setup.
One thing that I did that I did not use to do is use vertex painting to define my ID masks. I used to use material IDs which usually meant I had a copy of the mesh with the unique materials associated with each part. Vertex painting is much faster, I found and you can use the same mesh for baking all maps including the IDs and in Blender its a very quick process.
For texturing the armchair for example I used a texture that I liked online then used Substance sampler to de-light it and make-it-tile. From there it was matter of constructing it in substance painter to my liking.

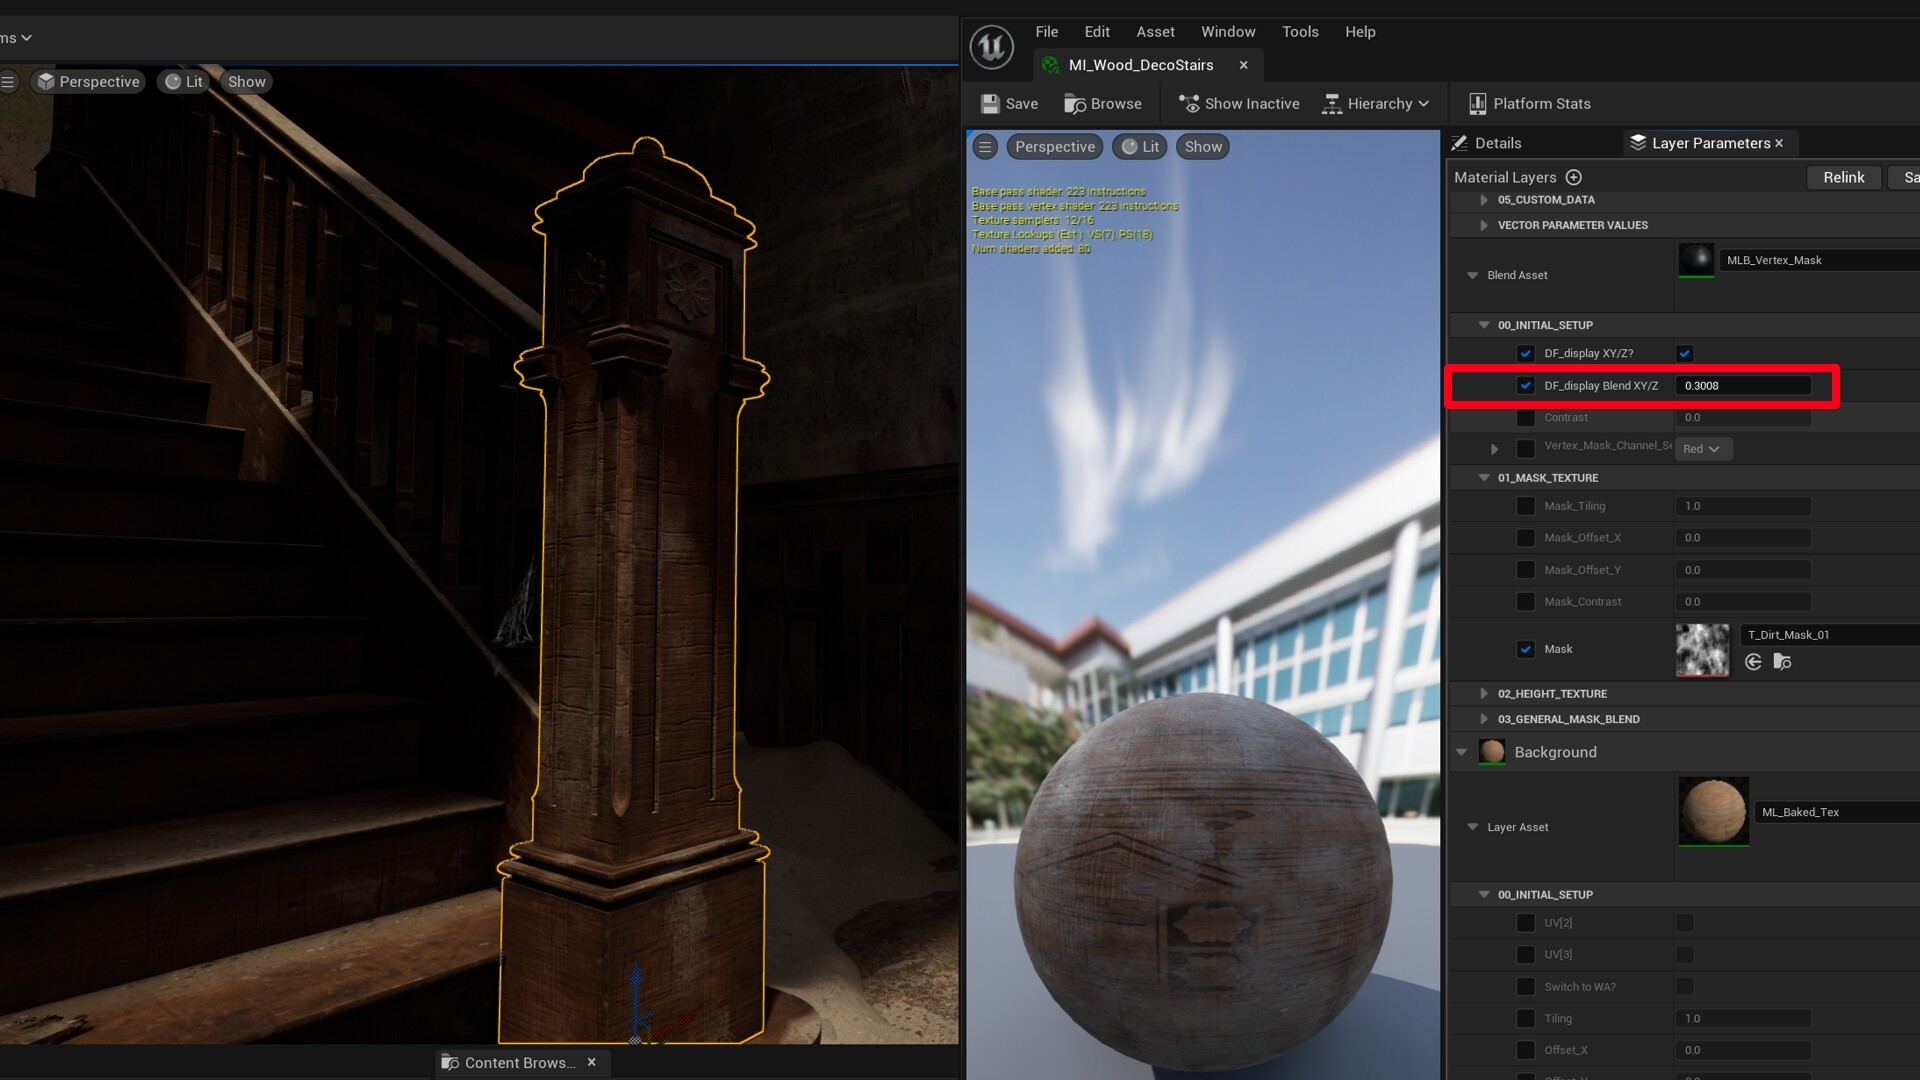
Anyway the other notable thing I did was use the vertex mask from Extile Plus to create materials that allow for another texture set to be stacked on top with controls on how much to apply on the xyz axis. In this case this is controlled via the display blend XYZ slider. This helped apply the sand on all meshes very easily and refine with vertex paint where necessary.
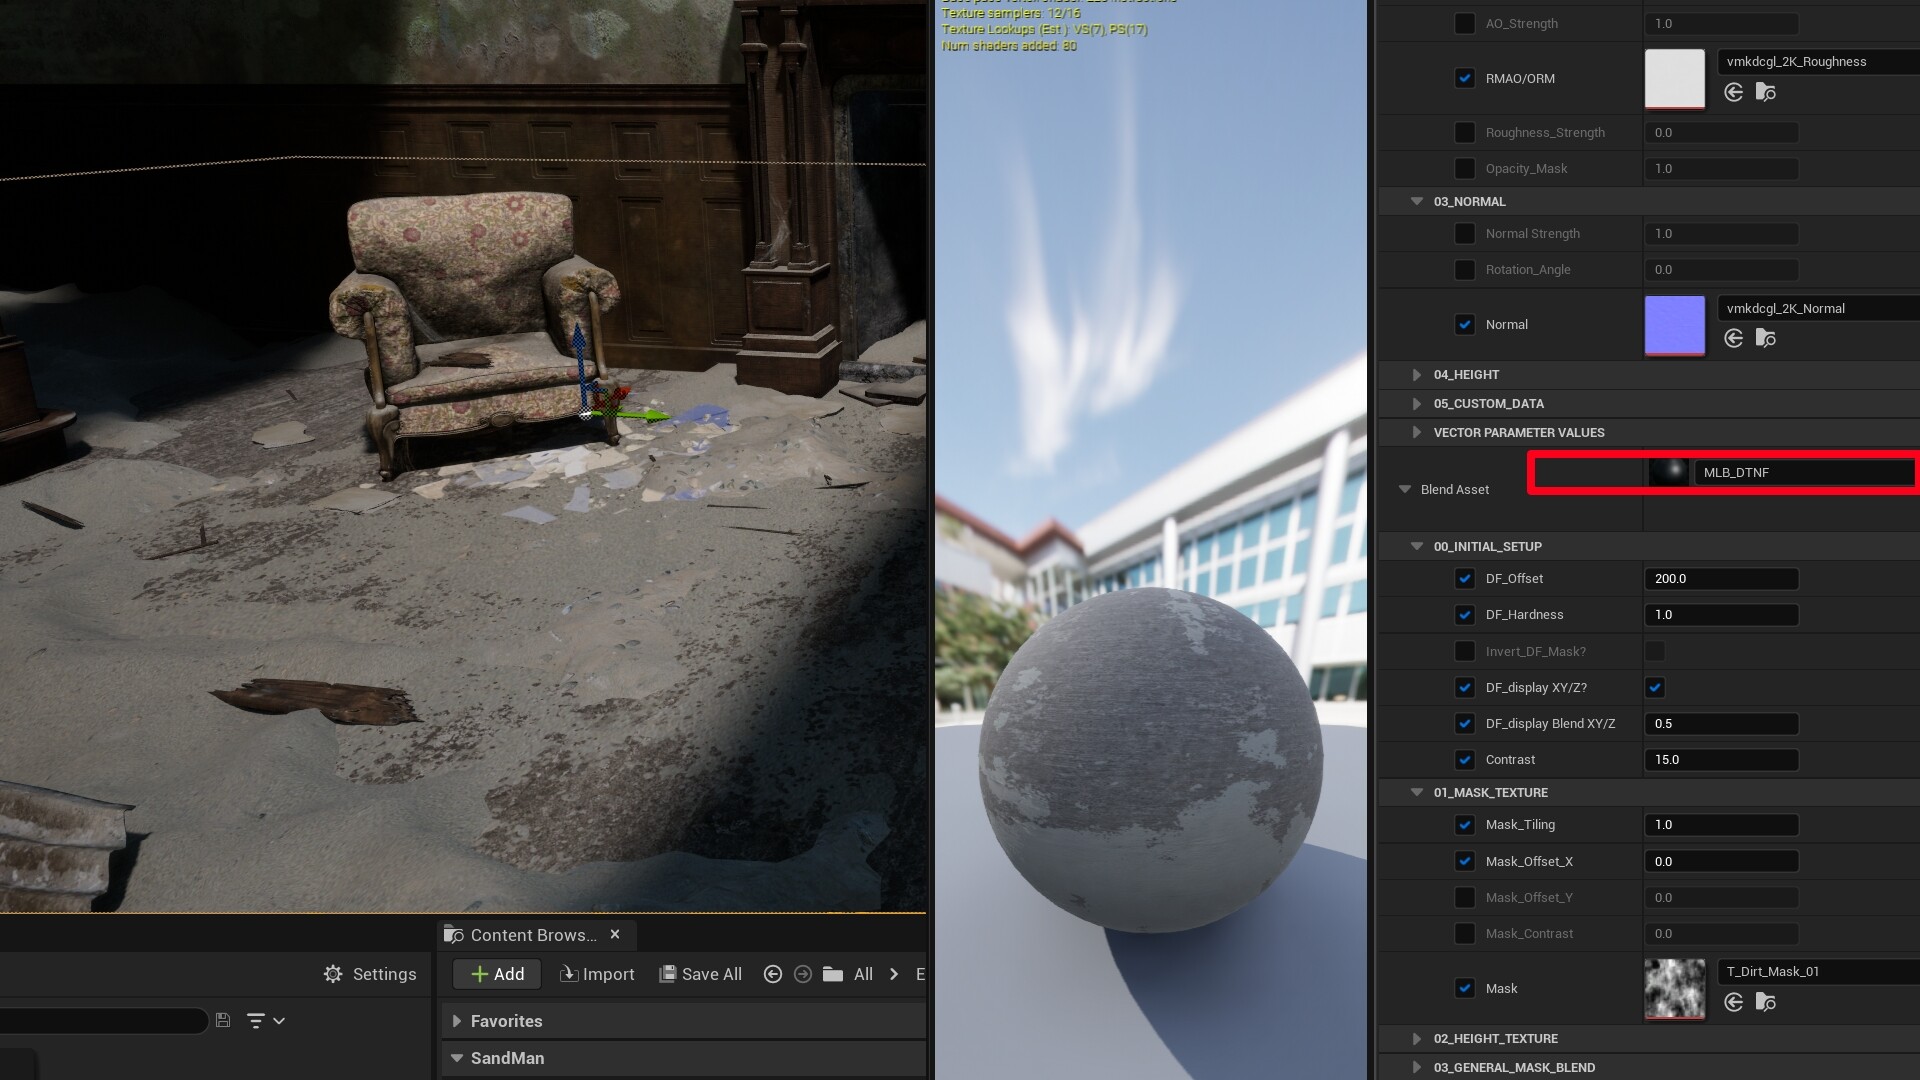
For the floor which is essentially a single plane I used another function found in Extile plus which uses distance fields to get a mask from interconnected meshes using the closest to nearest surface node.
I have a youtube video explaining how to use this without the need to have Extile to make it work here:
This allowed me to get a mask where the sand mesh intersected with the floor plane. Again I can control the axis placement to localize the mask if I wanted so that's how I created the sand on the floor with just one function!
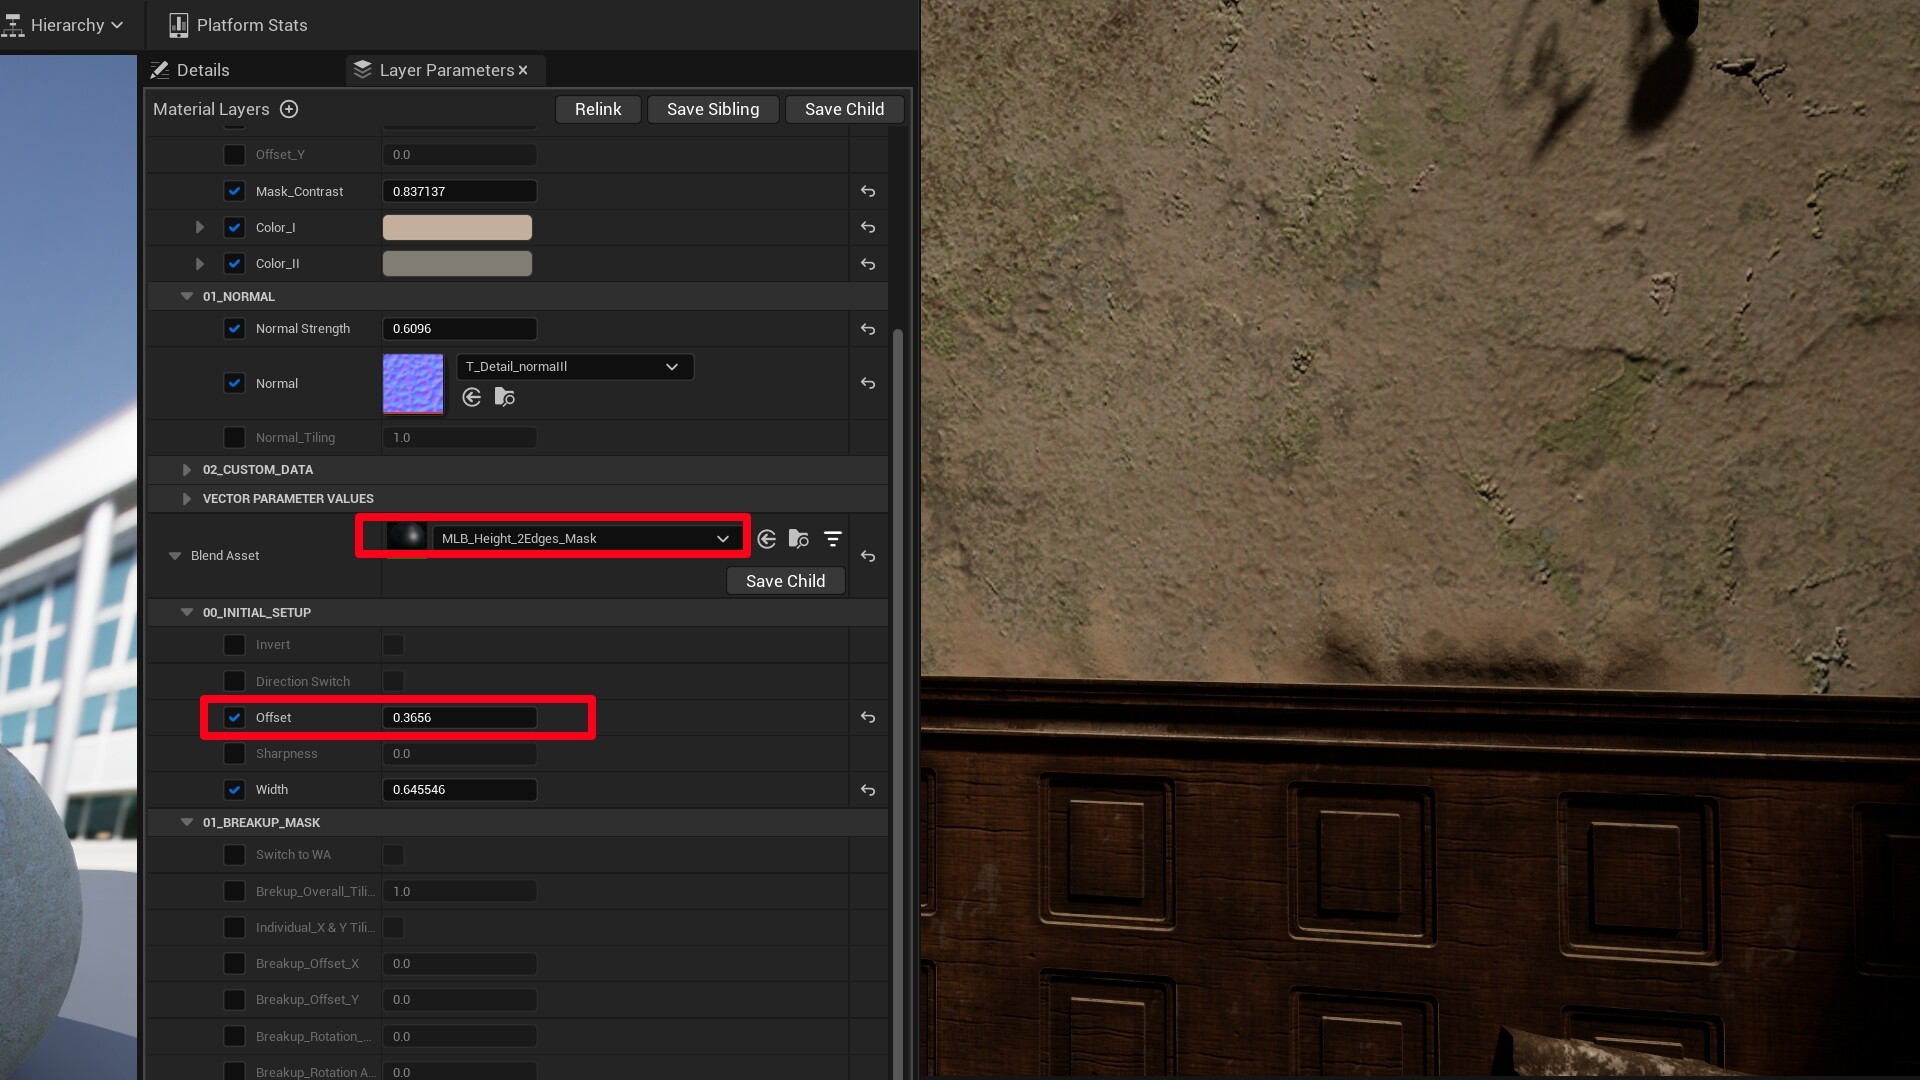
Another function I use is one that allows me to create a dirt mask on either sides of a wall or floor mesh. So I used this to get some dirt effect on the very top part of the roof and also the bottom part at the same time. very handy way to break wall ceiling/floor connections which otherwise sometimes look too clean. You can of course use decal meshes to achieve similar effect but I find for certain instances this is faster and easier and less costly. In this case adjusting the offset adjusts the height between the top and bottom mask created.
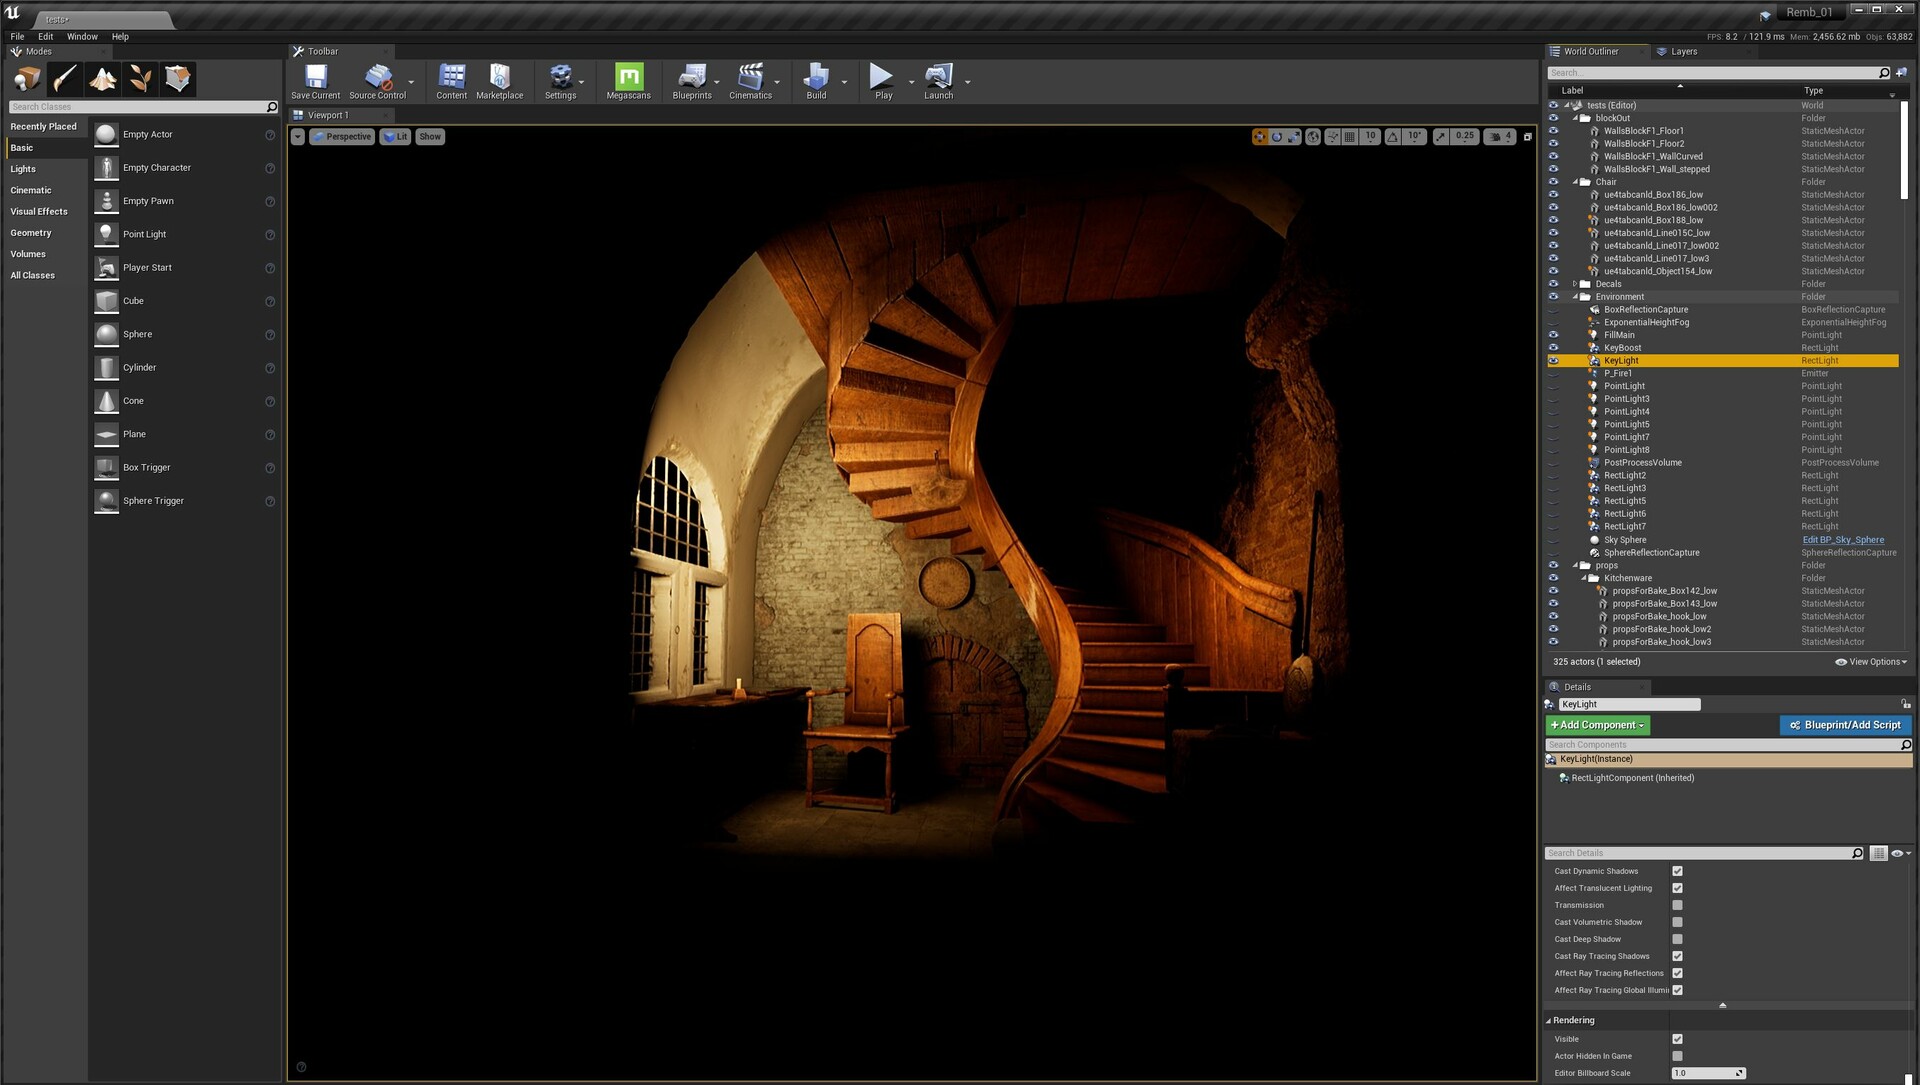
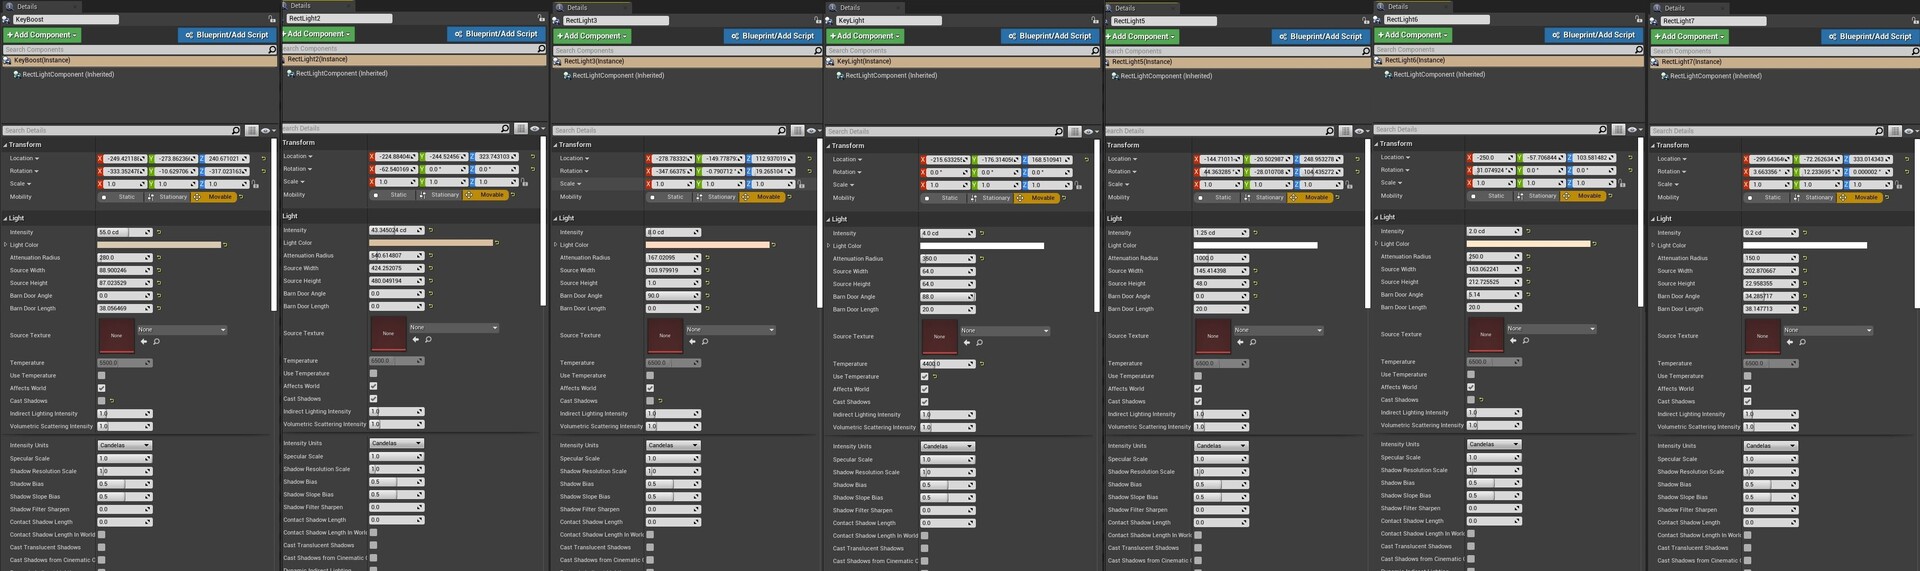
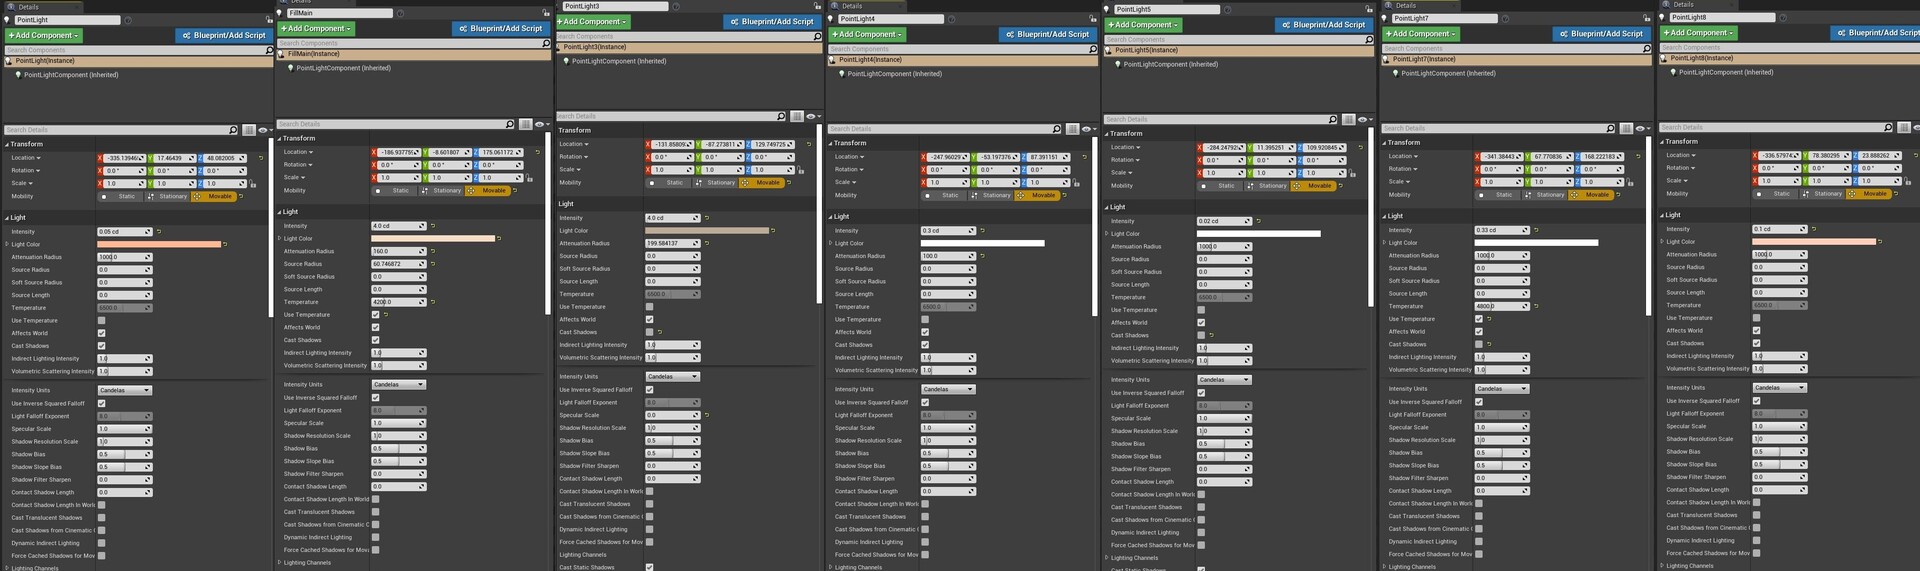
Those are the basic materials I used. In terms of lighting Lumen works out of the box and now with the Preview version there's even less things to switch on prior to starting. The only thing I note is that for some reason I couldn't turn on hardware raytracing in Lumen settings unless I turned on support for hardware raytracing in the rendering tab in the project settings.
I used a very basic lighting setup with a directional, skylight with some tweaking here and there. I did however increase the source angle of the directional light to get softer shadows and get rid of a harsh directionality as I envisioned a somewhat overcast sky. I experimented with an hdri but in the end I used the sky atmosphere to set the scene as it worked better for me. I went for a cinematic look and accentuated the height fog a tad but overall I tried to keep things as minimal as possible. One thing to note is that if you are having difficulty getting the amount of height fog you want you can push the Extinction Scale in the volumetric settings above the default which stops at 10 - so you would need to enter a high number and bypass the slider. You can also play with the color here.
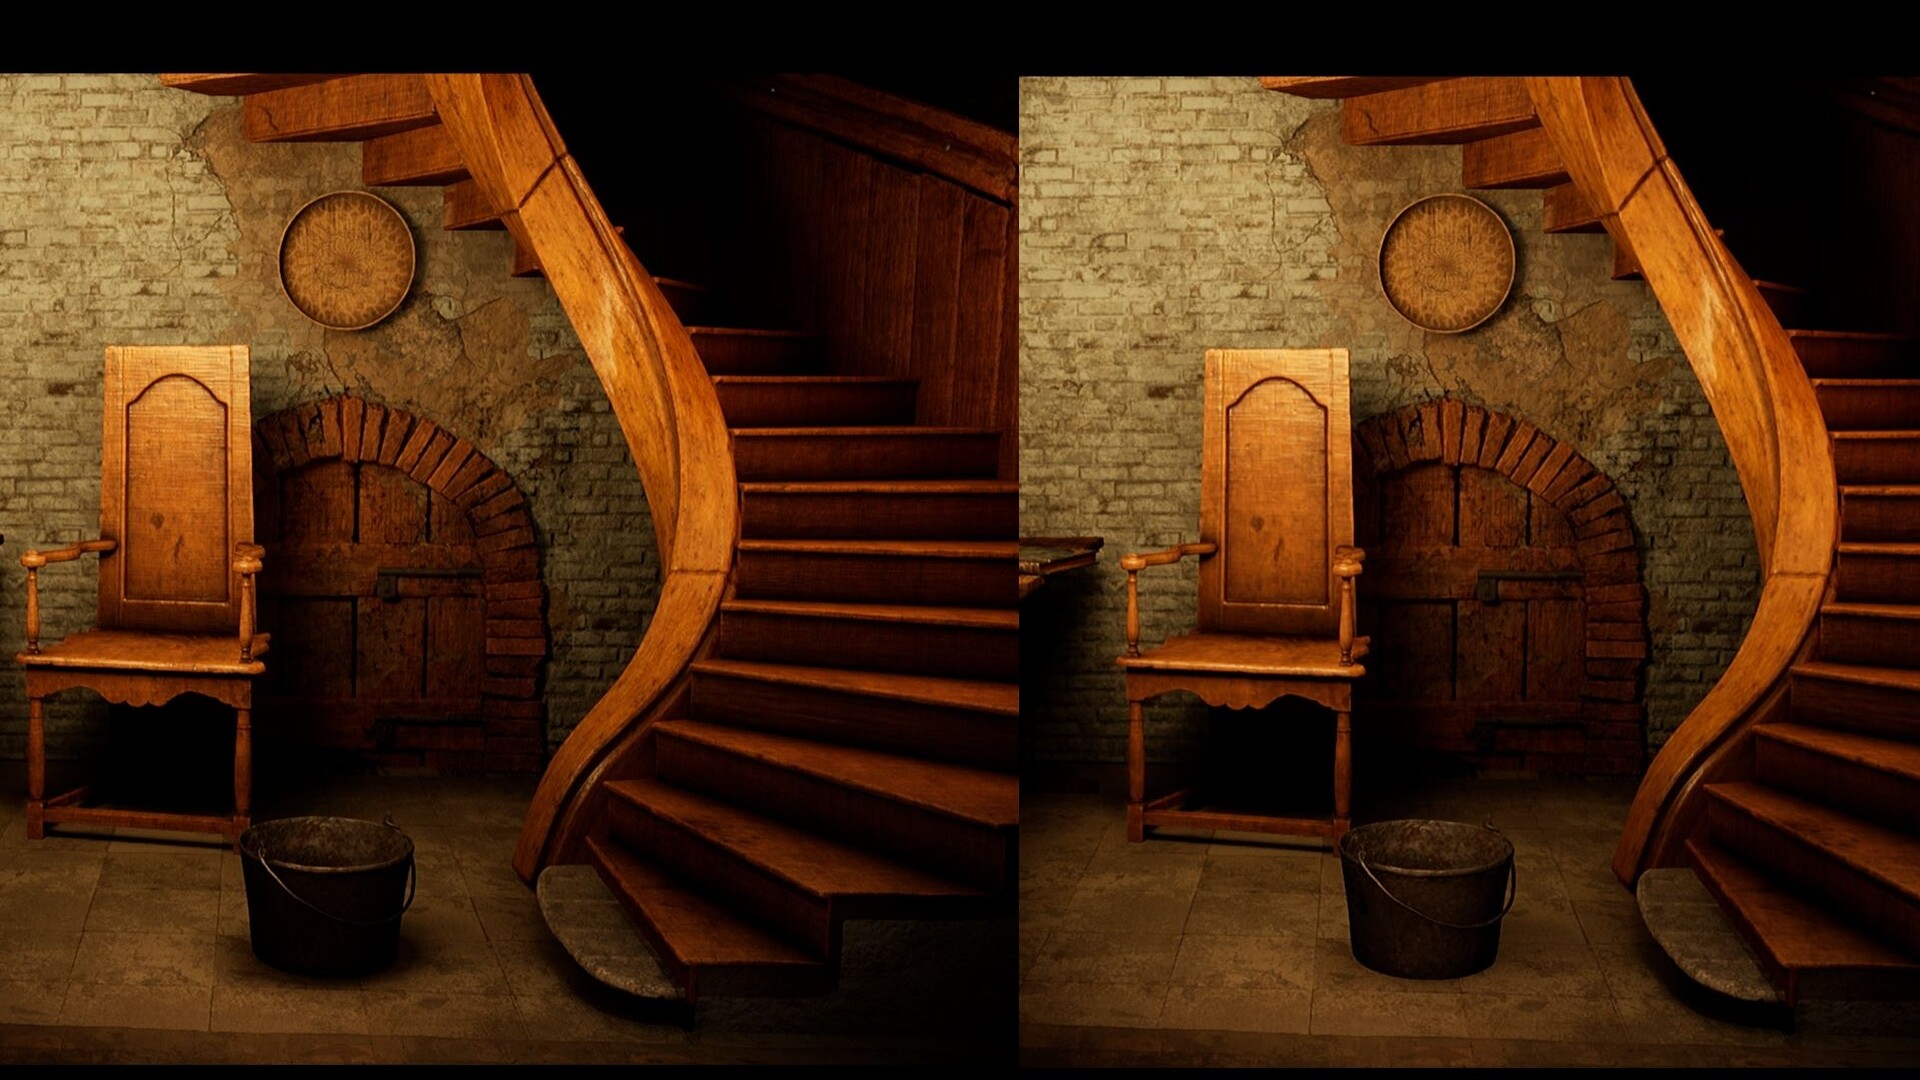
I tried a couple of scenarios and perhaps I'll try some more in the future.
In general I was hitting between 40-60fps on my 4k monitor using an rtx 2080ti without much effort in optimization with full Lumen turned on including on the lansdcape I had outside. I'm also running everything from external disk due to lack of space currently. I could have optimized more and one way is by using custom primitive data to achieve variations in a scene without incurring any additional draw calls. You can watch the video above to see how to implement this in you workflows. So overall very pleased with lumen and nanite. I also like the new UI - much more cleaner and easy to remember and focus on.
Another thing to take note of is that lumen likes thick walls and ceilings to stop the light from coming through so single faced meshes will not give you good results.
A very interesting site I discovered that inspired me in many ways is: https://ipoxstudios.com/mastering-composition-photography-art/. Its not free for everything but there are some free articles or you can join to get more access. I specifically checked this article on the cinematography of Dune https://ipoxstudios.com/dune-2021-composition-techniques-part-two-analyzed-cinema/. It has a lot of resources and analysis on cinematography and compositional setup in general and worth to check out. Of course the internet is filled with free resources!
Other than that I didn't touch any Lumen settings as I really didn't feel there was any need to. Also didn't touch any other parameters in the ppv either. What can I say? Lumen is amazing and so much of a cinematographer's tool now...it allows you to see in real time the whole picture and now with support for landscapes the possibilities are even bigger and it will definitely be where my next scene will take place in!
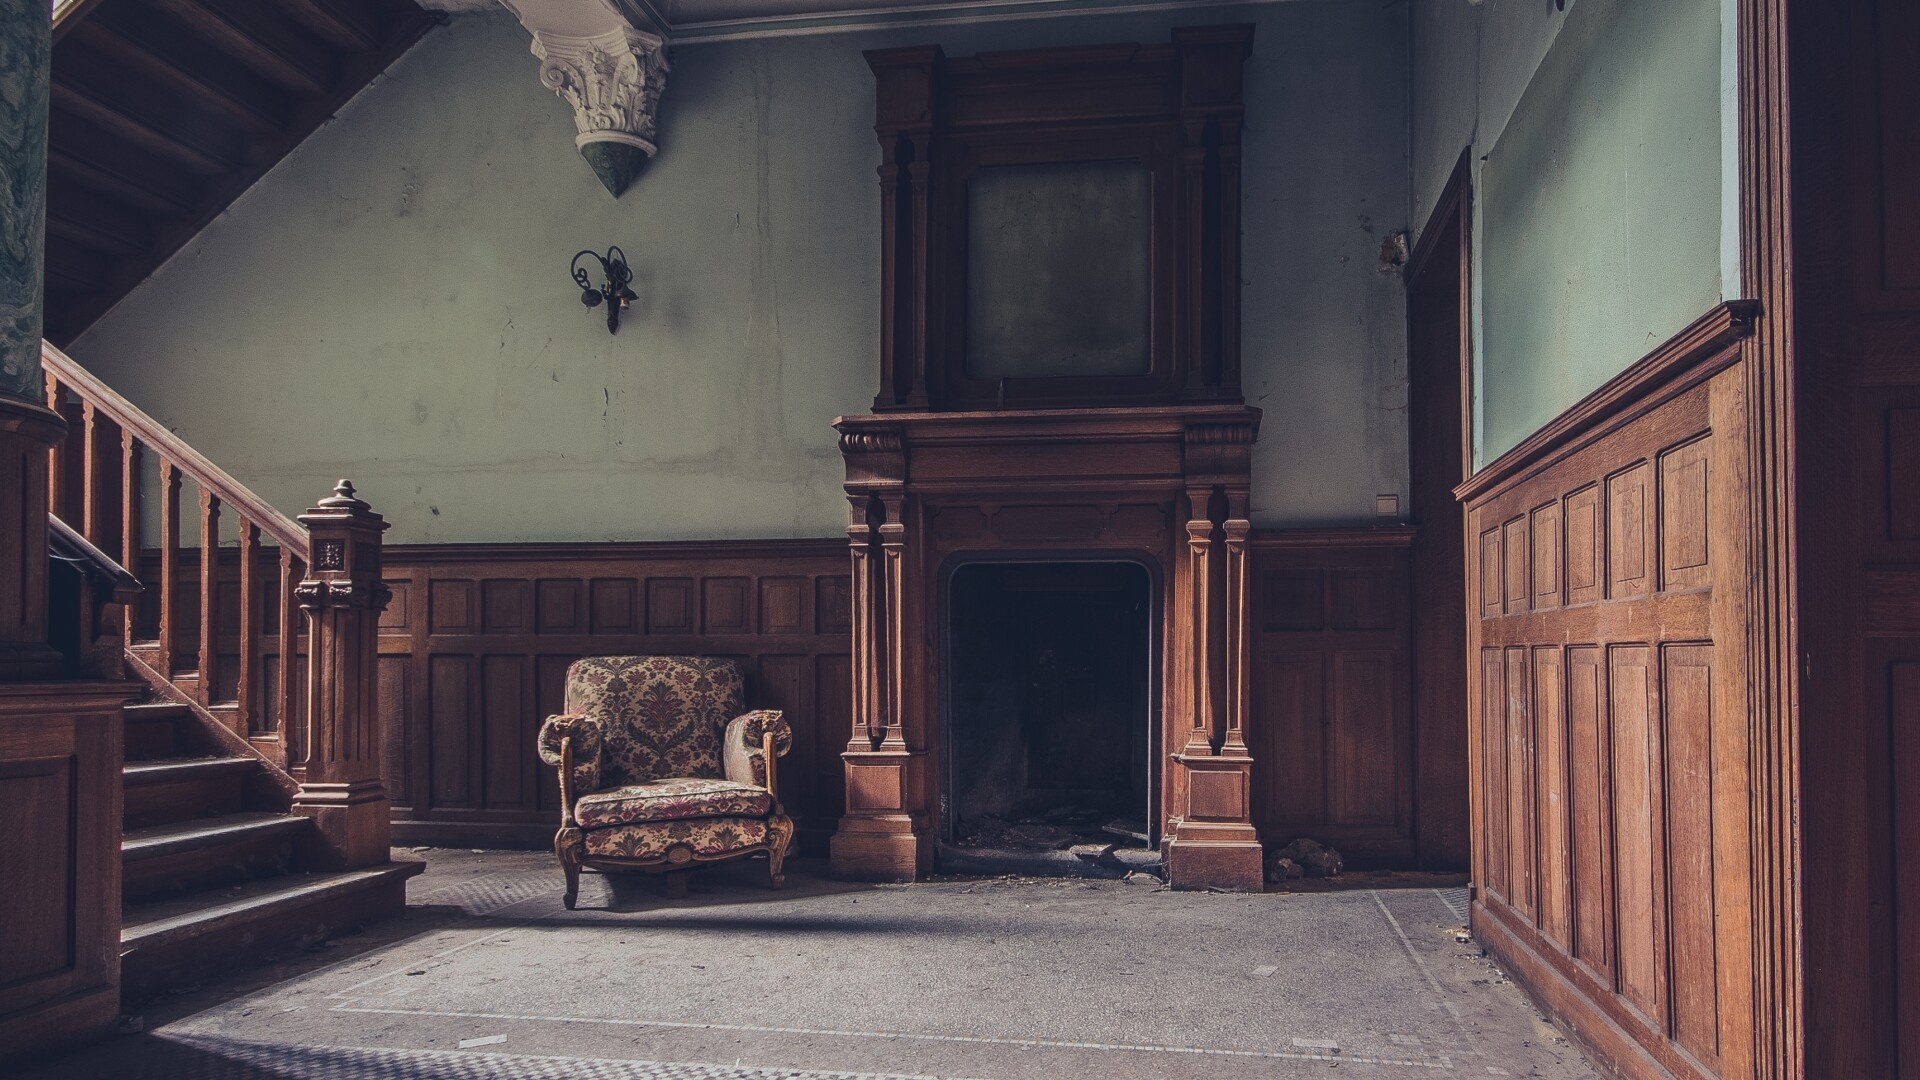
Initial Inspiration - a photograph (unfortunately I forgot to take down the name of person who shot it ...but credits to AR written!)

Lighting scenario #1

Lighting scenario #2
P.S Extile Plus has a discord channel (https://discord.gg/cJF8vKK4j8) for those who already own the product but also for anyone who has any general questions or wants to hang out...pls come and join...Thanks!